AWS Three-Tier Architecture: Part-2


Networking and Security
VPC Creation
Navigate to the VPC dashboard in the AWS console and navigate to Your VPCs on the left hand side.

Make sure VPC only is selected, and fill out the VPC Settings with a Name tag and a CIDR range of your choice.
NOTE:*Make sure you pay attention to the region you’re deploying all your resources in. You’ll want to stay consistent for this entier project.*
NOTE:*Choose a CIDR range that will allow you to create at least 6 subnets.*

Subnet Creation
Next, create your subnets by navigating to Subnets on the left side of the dashboard and clicking Create subnet.

We will need six subnets across two availability zones. That means that three subnets will be in one availability zone, and three subnets will be in another zone. Each subnet in one availability zone will correspond to one layer of our three tier architecture. Create each of the 6 subnets by specifying the VPC we created in part 1 and then choose a name, availability zone, and appropriate CIDR range for each of the subnets.
*NOTE: It may be helpful to have a naming convention that will help you remember what each subnet is for. For example in one AZ you might have the following:*Public-Web-Subnet-AZ-1, Private-App-Subnet-AZ-1, Private-DB-Subnet-AZ-1.
NOTE: Remember, your CIDR range for the subnets will be subsets of your VPC CIDR range.

Your final subnet setup should be similar to this. Verify that you have 3 subnets across 2 different availability zones.

Internet Connectivity
Internet Gateway
In order to give the public subnets in our VPC internet access we will have to create and attach an Internet Gateway. On the left hand side of the VPC dashboard, select Internet Gateway.

Create your internet gateway by simply giving it a name and clicking Create internet gateway.

After creating the internet gateway, attach it to your VPC that you create in the VPC and Subnet Creation step of the workshop. You have a couple options on how to do this, either with the creation success message or the Actions drop down.
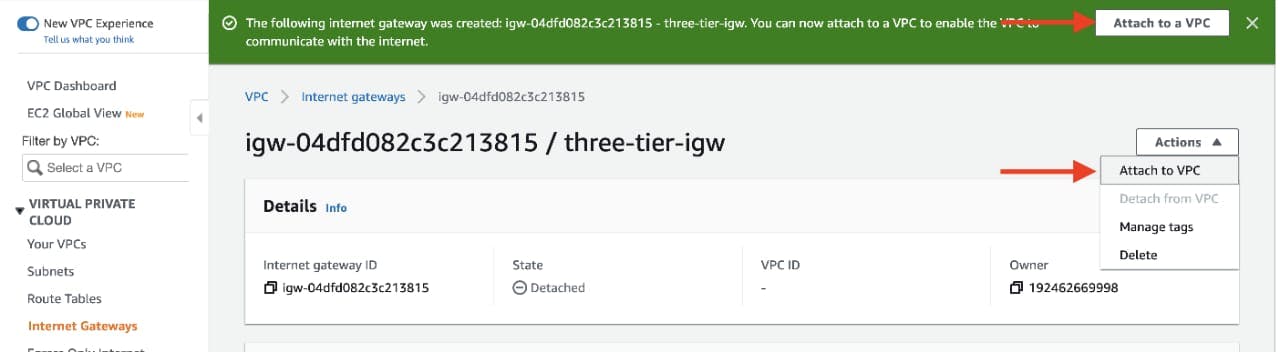
Then, select the correct VPC and click Attach internet gateway.

NAT Gateway
In order for our instances in the app layer private subnet to be able to access the internet they will need to go through a NAT Gateway. For high availability, you’ll deploy one NAT gateway in each of your public subnets. Navigate to NAT Gateways on the left side of the current dashboard and click Create NAT Gateway.
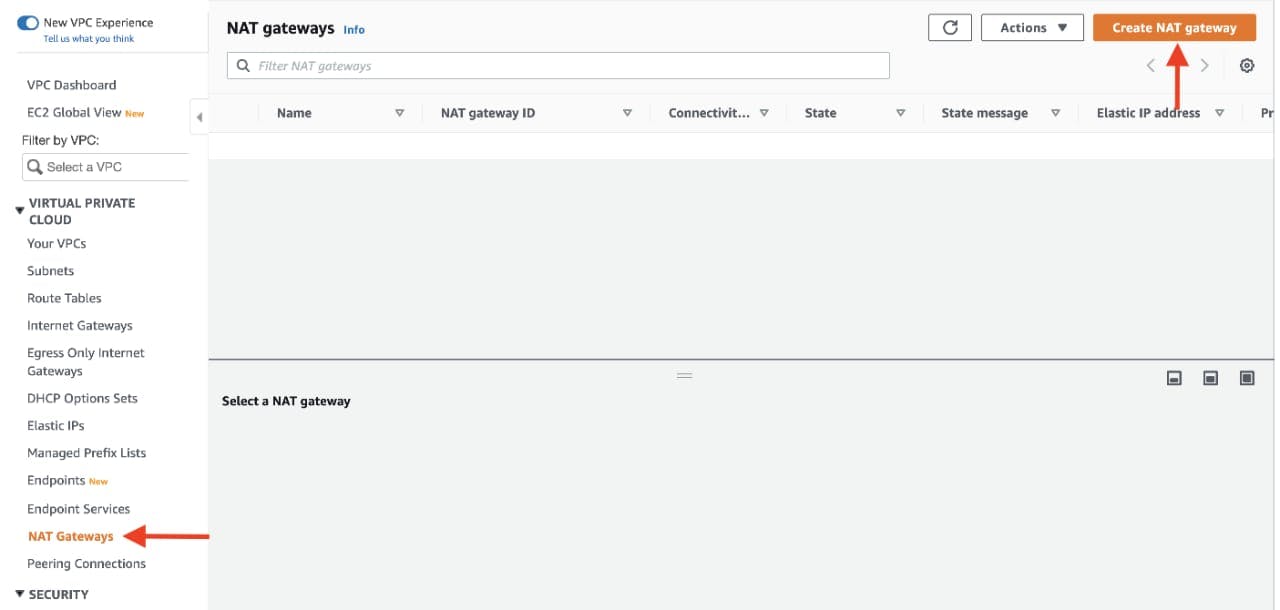
Fill in the Name, choose one of the public subnets you created in part 2, and then allocate an Elastic IP. Click Create NAT gateway.

Repeat step 1 and 2 for the other subnet.
Routing Configuration
Navigate to Route Tables on the left side of the VPC dashboard and click Create route table First, let’s create one route table for the web layer public subnets and name it accordingly.


After creating the route table, you'll automatically be taken to the details page. Scroll down and click on the Routes tab and Edit routes.
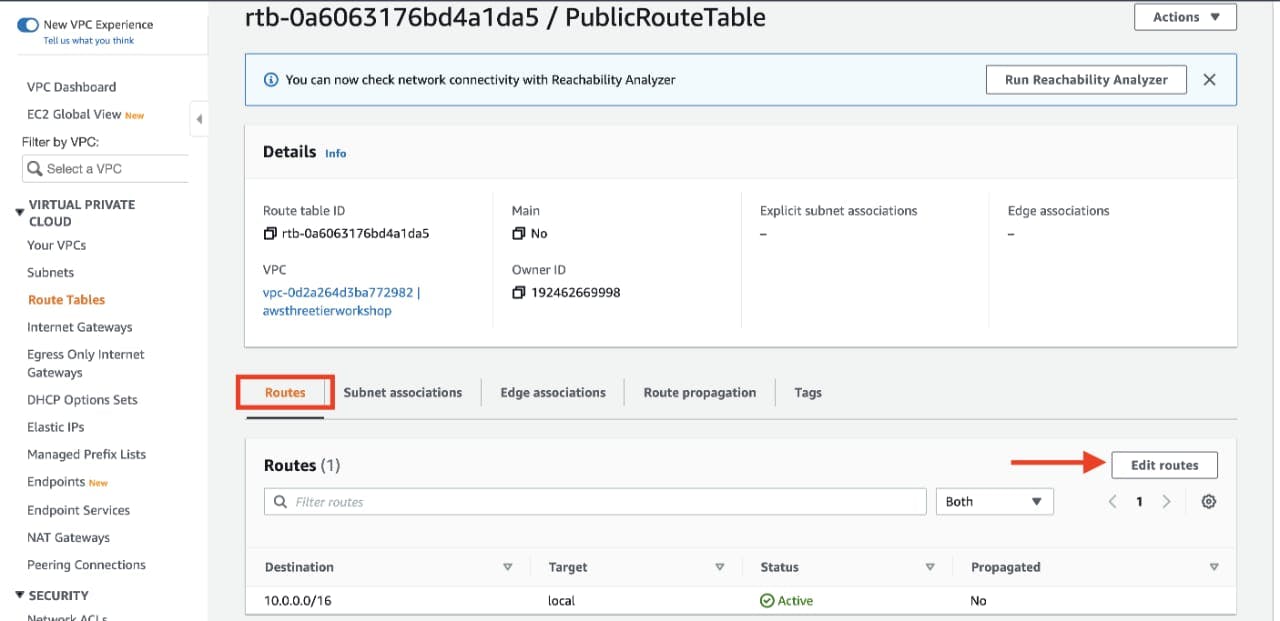
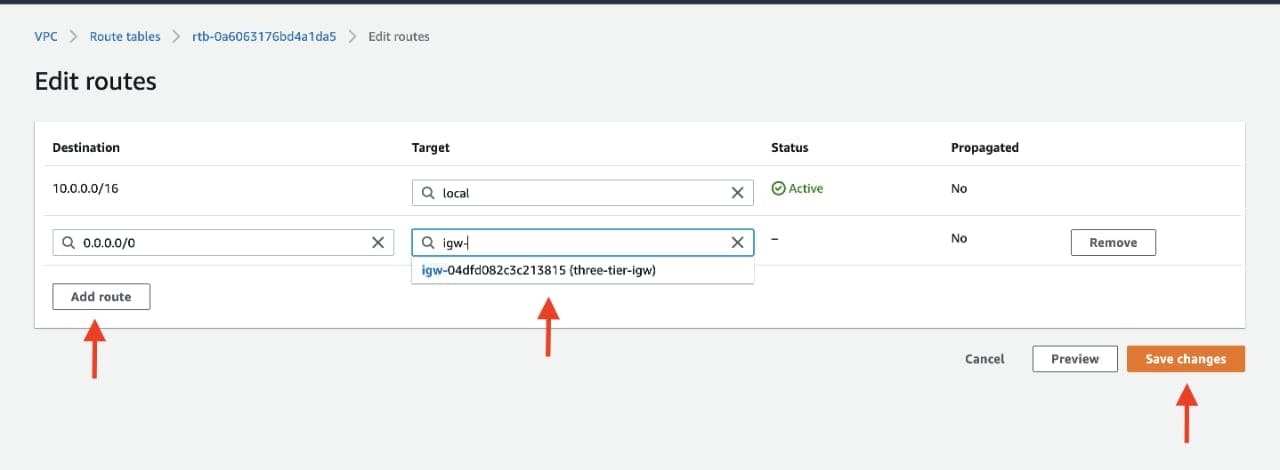
Add a route that directs traffic from the VPC to the internet gateway. In other words, for all traffic destined for IPs outside the VPC CDIR range, add an entry that directs it to the internet gateway as a target. Save the changes.
Edit the Explicit Subnet Associations of the route table by navigating to the route table details again. Select Subnet Associations and click Edit subnet associations.

Select the two web layer public subnets you created eariler and click Save associations.

Now create 2 more route tables, one for each app layer private subnet in each availability zone. These route tables will route app layer traffic destined for outside the VPC to the NAT gateway in the respective availability zone, so add the appropriate routes for that.

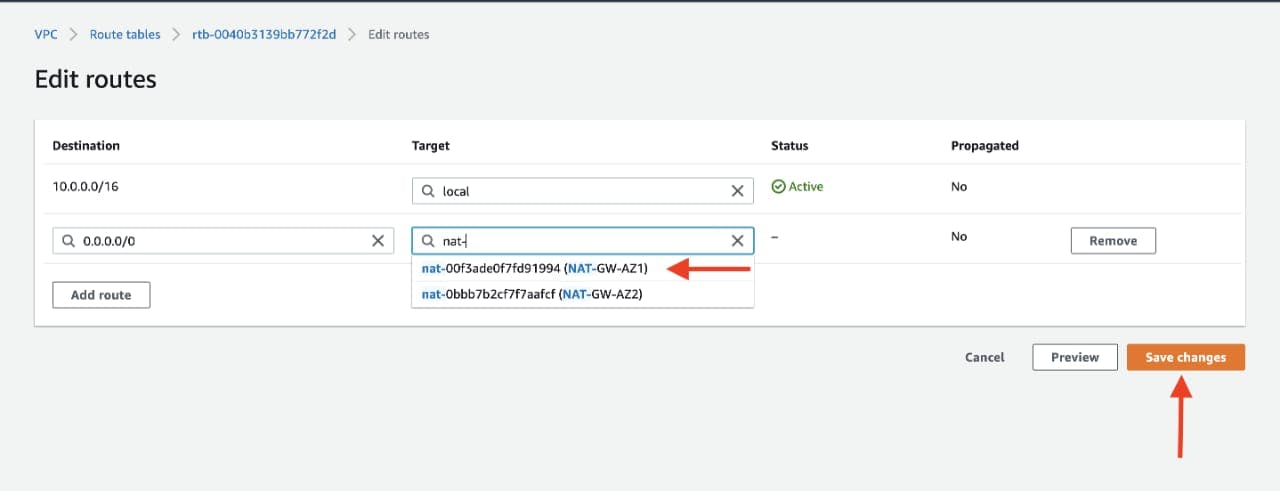
Once the route tables are created and routes added, add the appropriate subnet associations for each of the app layer private subnets.

Security Groups
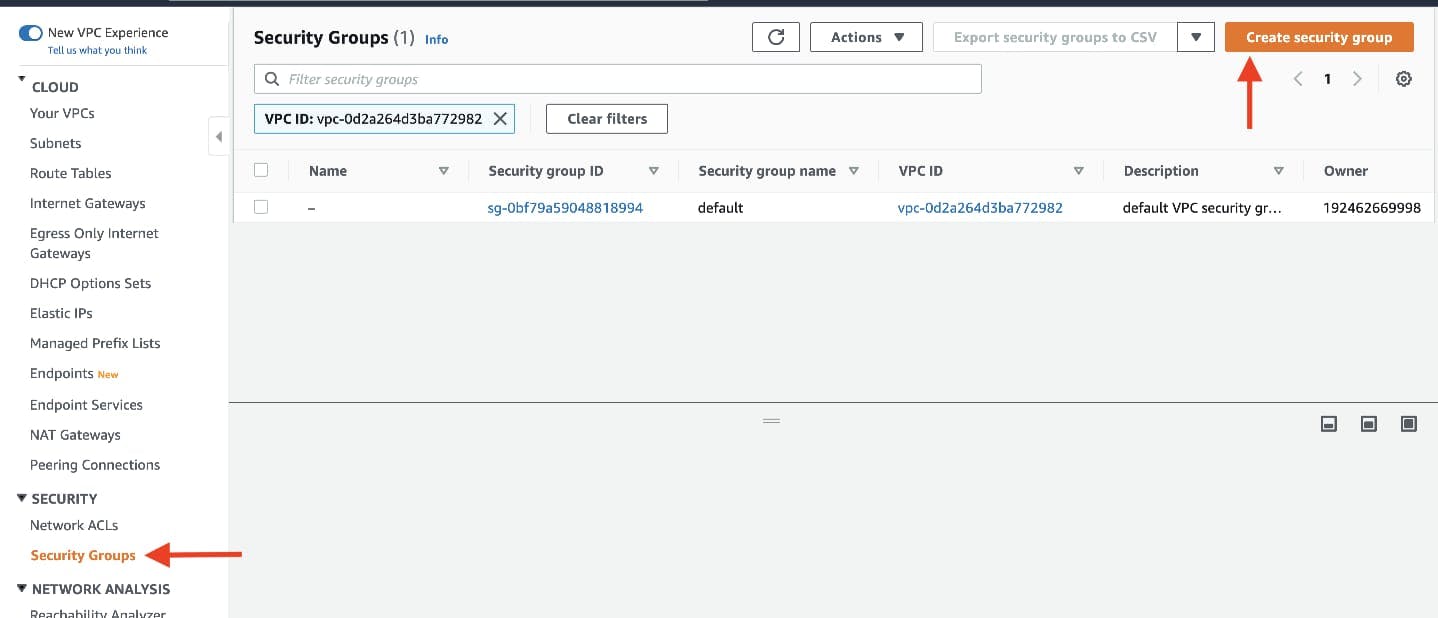
Security groups will tighten the rules around which traffic will be allowed to our Elastic Load Balancers and EC2 instances. Navigate to Security Groups on the left side of the VPC dashboard, under Security.
The first security group you’ll create is for the public, internet facing load balancer. After typing a name and description, add an inbound rule to allow HTTP type traffic for your IP.

The second security group you’ll create is for the public instances in the web tier. After typing a name and description, add an inbound rule that allows HTTP type traffic from your internet facing load balancer security group you created in the previous step. This will allow traffic from your public facing load balancer to hit your instances. Then, add an additional rule that will allow HTTP type traffic for your IP. This will allow you to access your instance when we test.

The third security group will be for our internal load balancer. Create this new security group and add an inbound rule that allows HTTP type traffic from your public instance security group. This will allow traffic from your web tier instances to hit your internal load balancer.

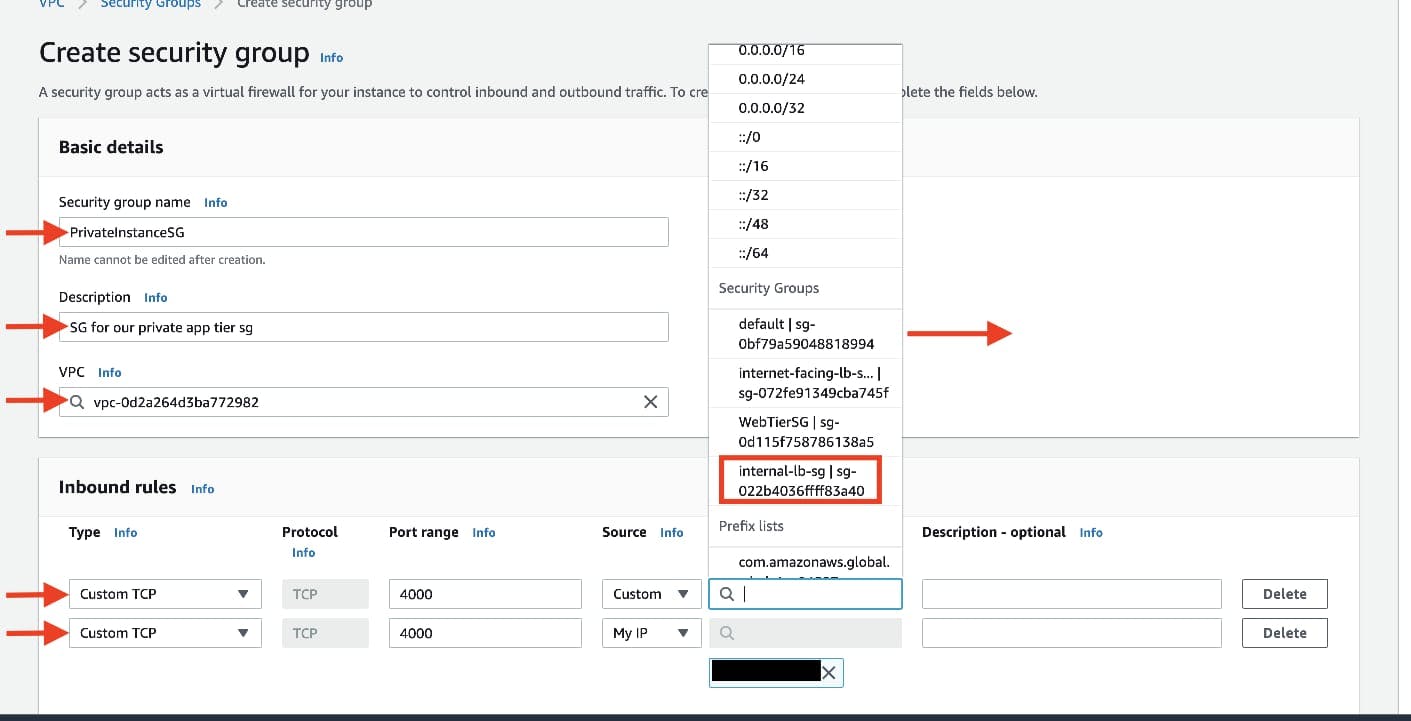
The fourth security group we’ll configure is for our private instances. After typing a name and description, add an inbound rule that will allow TCP type traffic on port 4000 from the internal load balancer security group you created in the previous step. This is the port our app tier application is running on and allows our internal load balancer to forward traffic on this port to our private instances. You should also add another route for port 4000 that allows your IP for testing.
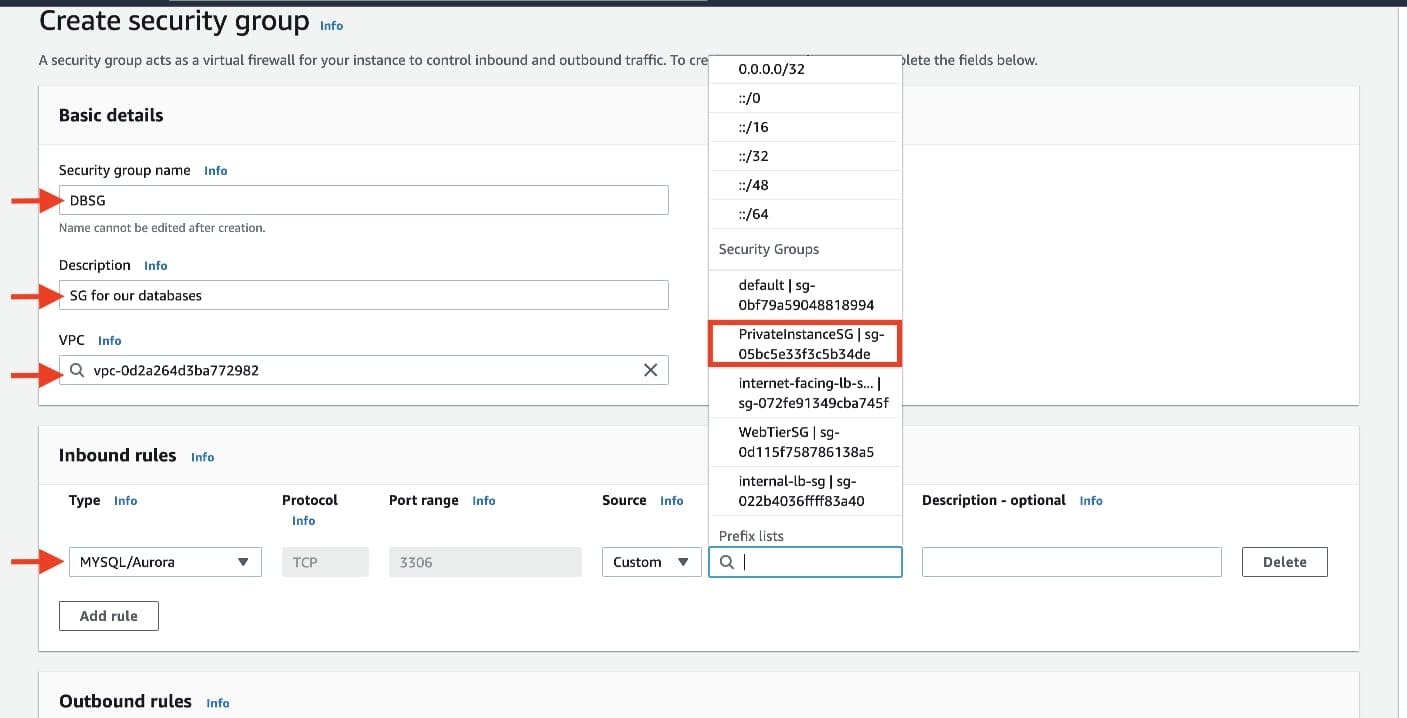
The fifth security group we’ll configure protects our private database instances. For this security group, add an inbound rule that will allow traffic from the private instance security group to the MYSQL/Aurora port (3306).
Conclusion
I hope you found this journey through AWS three-tier architecture implementation insightful and enjoyable.
Please continue to Part 3 to learn more about the further steps in our implementation process.
You can access Part 3 via the following link below:
AWS Three Tier Architecture(Part-3)
Thankyou !!!
Hope You have Learned !!!