AWS Three-Tier Architecture: Part-4


App Instance Deployment
Navigate to the EC2 service dashboard and click on Instances on the left hand side. Then, click Launch Instances.

Select the first Amazon Linux 2 AMI.

We'll be using the free tier eligible T.2 micro instance type. Select that and click Next: Configure Instance Details.
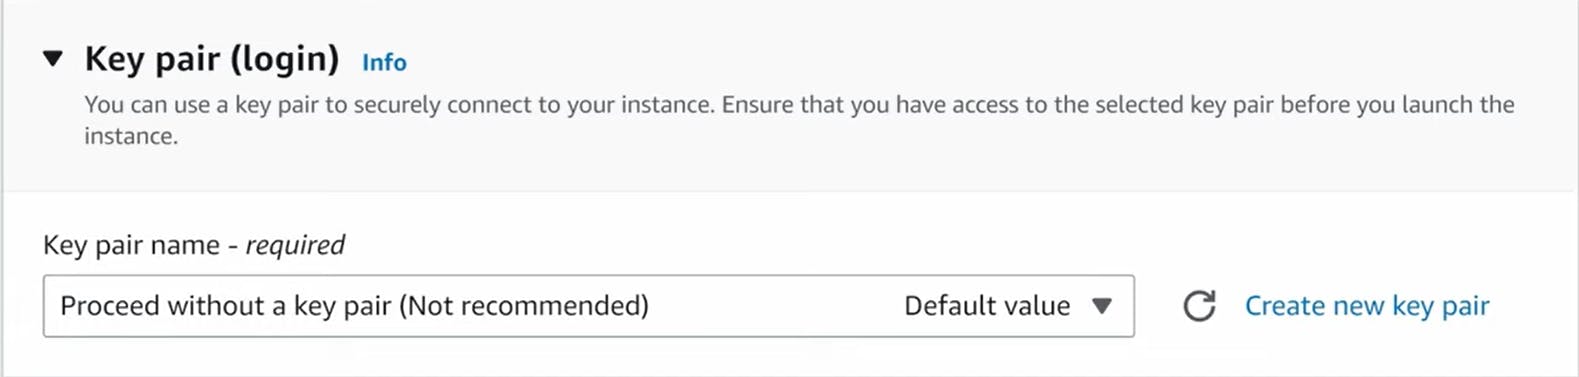
Proceed without key-pair because we going to use ec2-instance login.
When configuring the instance details, make sure to select to correct Network, subnet, and IAM role we created. Note that this is the app layer, so use one of the private subnets we created for this layer.
Below we using already created VPC and Private Subnet AZ-1

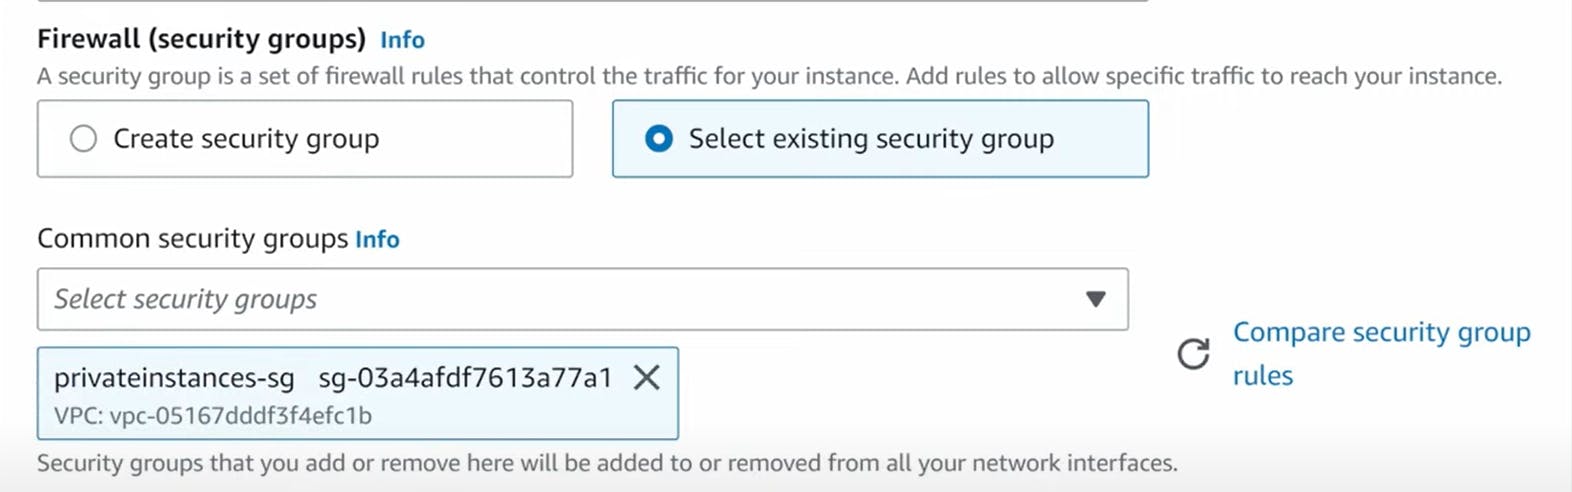
Below we using already created private instance security group
Below we using already created IAM role

Finally click "Launch Instance"
Connect to Instance
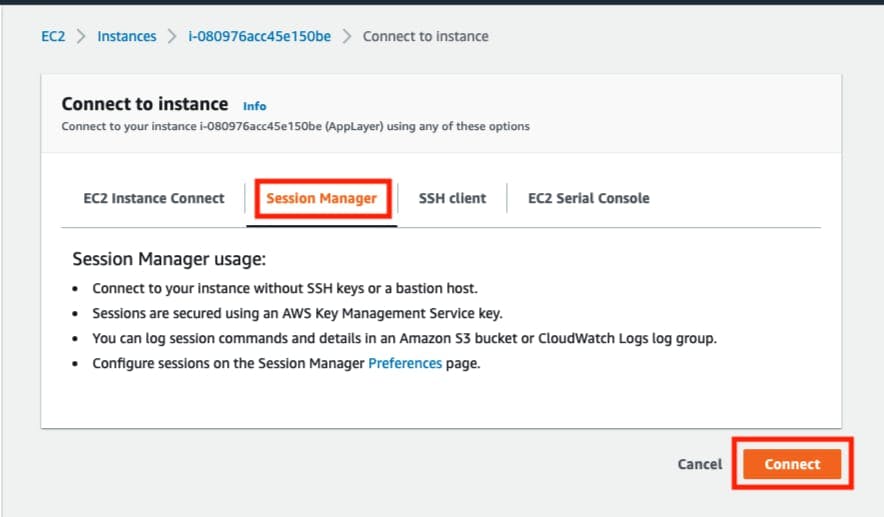
Navigate to your list of running EC2 Instances by clicking on Instances on the left hand side of the EC2 dashboard. When the instance state is running, connect to your instance by clicking the checkmark box to the left of the instance, and click the connect button on the top right corner of the dashboard. Select the Session Manager tab, and click connect. This will open a new browser tab for you.
NOTE: If you get a message saying that you cannot connect via session manager, then check that your instances can route to your NAT gateways and verify that you gave the necessary permissions on the IAM role for the Ec2 instance.

When you first connect to your instance like this, you will be logged in as ssm-user which is the default user. Switch to ec2-user by executing the following command in the browser terminal:
sudo -su ec2-userLet’s take this moment to make sure that we are able to reach the internet via our NAT gateways. If your network is configured correctly up till this point, you should be able to ping the google DNS servers:
ping 8.8.8.8You should see a transmission of packets. Stop it by pressing cntrl c.
NOTE: If you can’t reach the internet then you need to double check your route tables and subnet associations to verify if traffic is being routed to your NAT gateway!
Configure Database
Start by downloading the MySQL CLI:
sudo yum install mysql -yif above one causing issue like,

try the below commands to install without any errors
sudo wget https://dev.mysql.com/get/mysql57-community-release-e17-11.noarch.rpmsudo rpm --import https://repo.mysql.com/RPM-GPG-KEY-mysql-2022sudo yum install https://dev.mysql.com/get/mysql57-community-release-e17-11.noarch.rpmInitiate your DB connection with your Aurora RDS writer endpoint. In the following command, replace the RDS writer endpoint and the username, and then execute it in the browser terminal:
mysql -h CHANGE-TO-YOUR-RDS-ENDPOINT -u CHANGE-TO-USER-NAME -pYou will then be prompted to type in your password. Once you input the password and hit enter, you should now be connected to your database.
Create a database called webappdb with the following command using the MySQL CLI:
CREATE DATABASE webappdb;You can verify that it was created correctly with the following command:
SHOW DATABASES;Create a data table by first navigating to the database we just created:
USE webappdb;Then, create the following transactions table by executing this create table command:
 CREATE TABLE IF NOT EXISTS transactions(id INT NOT NULL
 AUTO_INCREMENT, amount DECIMAL(10,2), description
 VARCHAR(100), PRIMARY KEY(id));
Verify the table was created:
SHOW TABLES;Insert data into table for use/testing later:
INSERT INTO transactions (amount,description) VALUES ('400','groceries');Verify that your data was added by executing the following command:
SELECT * FROM transactions;When finished, just type exit and hit enter to exit the MySQL client.
Configure App Instance
The first thing we will do is update our database credentials for the app tier. To do this, open the application-code/app-tier/DbConfig.js file from the github repo in your favorite text editor on your computer. You’ll see empty strings for the hostname, user, password and database. Fill this in with the credentials you configured for your database, the writer endpoint of your database as the hostname, and webappdb for the database. Save the file.
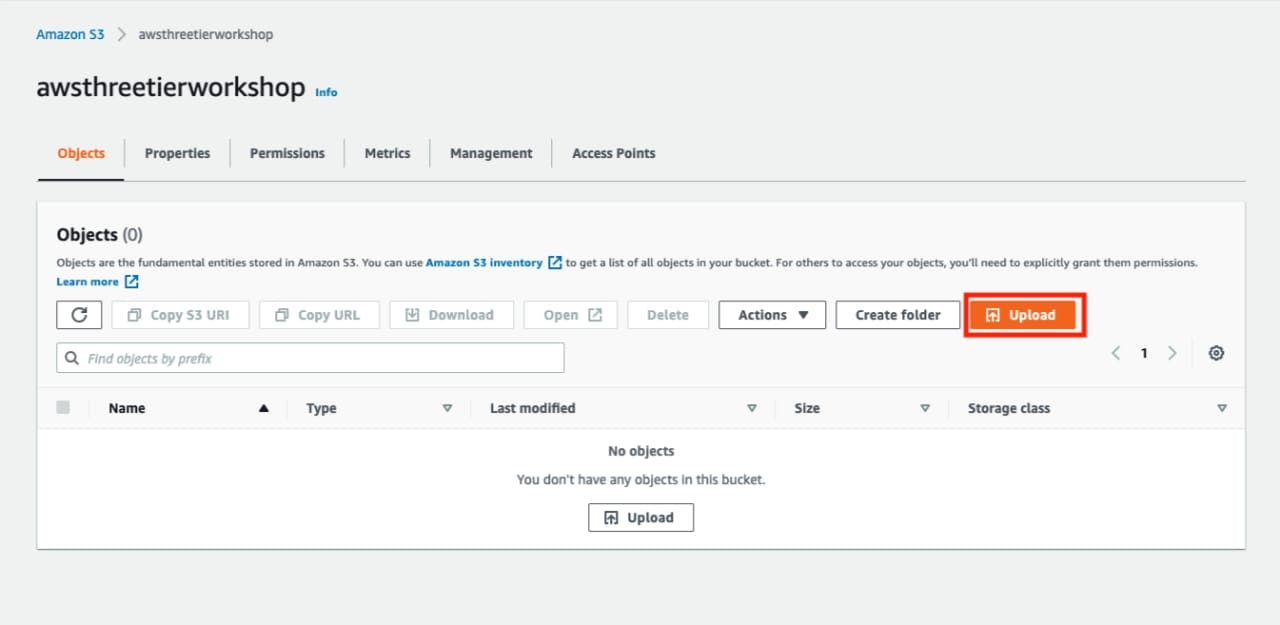
Upload the app-tier folder to the S3 bucket that you created in part 1.

Go back to your SSM session. Now we need to install all of the necessary components to run our backend application. Start by installing NVM (node version manager).
 curl -o- https://raw.githubusercontent.com/nvm-sh/nvm/v0.38.0/install.sh | bash
 source ~/.bashrc
Next, install a compatible version of Node.js and make sure it's being used.
 nvm install 16
 nvm use 16
PM2 is a daemon process manager that will keep our node.js app running when we exit the instance or if it is rebooted. Install that as well.
npm install -g pm2Now we need to download our code from our s3 buckets onto our instance. In the command below, replace BUCKET_NAME with the name of the bucket you uploaded the app-tier folder to:
 cd ~/
 aws s3 cp s3://BUCKET_NAME/app-tier/ app-tier --recursive
Navigate to the app directory, install dependencies, and start the app with pm2.
 cd ~/app-tier
 npm install
 pm2 start index.js
To make sure the app is running correctly run the following:
pm2 listIf you see a status of online, the app is running. If you see errored, then you need to do some troubleshooting. To look at the latest errors, use this command:
pm2 logsNOTE: If you’re having issues, check your configuration file for any typos, and double check that you have followed all installation commands till now.
Right now, pm2 is just making sure our app stays running when we leave the SSM session. However, if the server is interrupted for some reason, we still want the app to start and keep running. This is also important for the AMI we will create:
pm2 startupAfter running this you will see a message similar to this.
[PM2] To setup the Startup Script, copy/paste the following command: sudo env PATH=$PATH:/home/ec2-user/.nvm/versions/node/v16.0.0/bin /home/ec2-user/.nvm/versions/node/v16.0.0/lib/node_modules/pm2/bin/pm2 startup systemd -u ec2-user —hp /home/ec2-userDO NOT run the above command, rather you should copy and past the command in the output you see in your own terminal. After you run it, save the current list of node processes with the following command:
pm2 save
Test App Tier
Now let's run a couple tests to see if our app is configured correctly and can retrieve data from the database.
To hit out health check endpoint, copy this command into your SSM terminal. This is our simple health check endpoint that tells us if the app is simply running.
curl http://localhost:4000/healthThe response should looks like the following:
"This is the health check"Next, test your database connection. You can do that by hitting the following endpoint locally:
curl http://localhost:4000/transactionYou should see a response containing the test data we added earlier:
{"result":[{"id":1,"amount":400,"description":"groceries"},{"id":2,"amount":100,"description":"class"},{"id":3,"amount":200,"description":"other groceries"},{"id":4,"amount":10,"description":"brownies"}]}If you see both of these responses, then your networking, security, database and app configurations are correct.
Your app layer is fully configured and ready to go.
Conclusion
I hope you found this journey through AWS three-tier architecture implementation insightful and enjoyable.
Please continue to Part 5 to learn more about the further steps in our implementation process.
You can access Part 5 via the following link below:
AWS Three Tier Architecture(Part-5)
Thankyou !!!
Hope You have Learned !!!