AWS Three-Tier Architecture: Part-7
External Load Balancer and Auto Scaling
Web Tier AMI
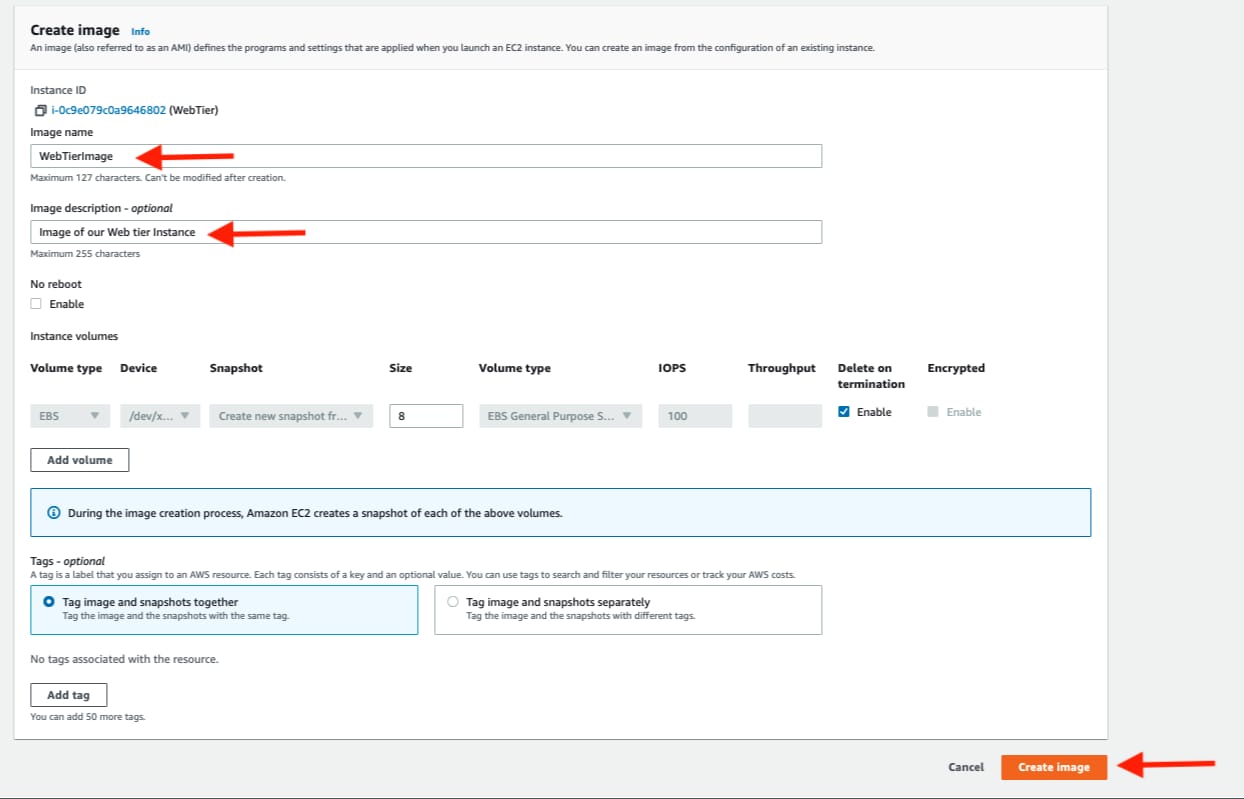
Navigate to Instances on the left hand side of the EC2 dashboard. Select the web tier instance we created and under Actions select Image and templates. Click Create Image.

Give the image a name and description and then click Create image. This will take a few minutes, but if you want to monitor the status of image creation you can see it by clicking AMIs under Images on the left hand navigation panel of the EC2 dashboard.

Target Group
While the AMI is being created, we can go ahead and create our target group to use with the load balancer. On the EC2 dashboard navigate to Target Groups under Load Balancing on the left hand side. Click on Create Target Group.
The purpose of forming this target group is to use with our load blancer so it may balance traffic across our public web tier instances. Select Instances as the target type and give it a name.

Then, set the protocol to HTTP and the port to 80. Remember this is the port NGINX is listening on. Select the VPC we've been using thus far, and then change the health check path to be /health. Click Next.

We are NOT going to register any targets for now, so just skip that step and create the target group.

Internet Facing Load Balancer
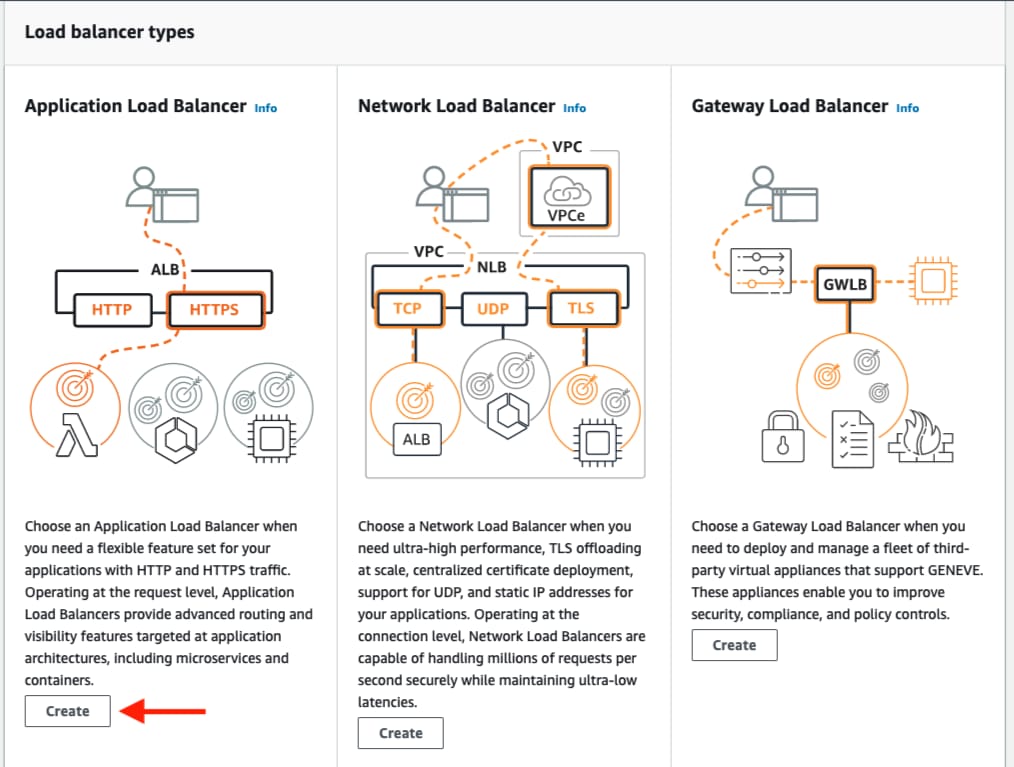
On the left hand side of the EC2 dashboard select Load Balancers under Load Balancing and click Create Load Balancer.

We'll be using an Application Load Balancer for our HTTP traffic so click the create button for that option.
After giving the load balancer a name, be sure to select internet facing since this one will not be public facing, but rather it will route traffic from our web tier to the app tier.
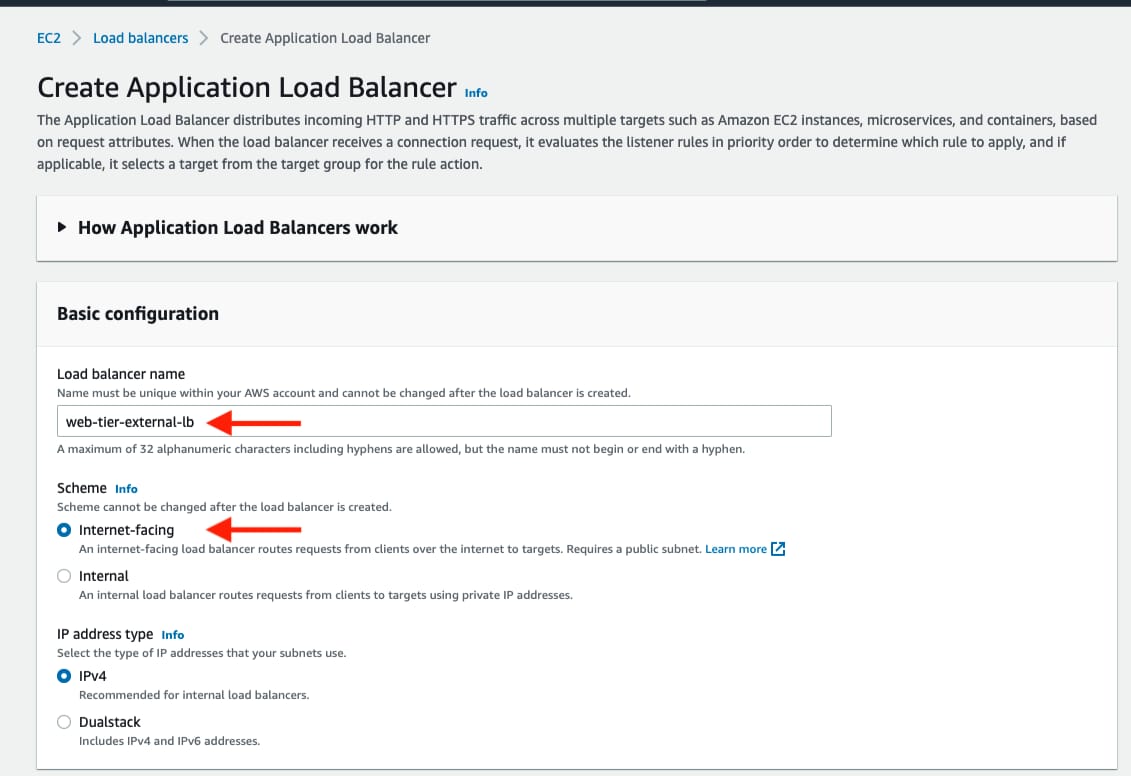
Select the correct network configuration for VPC and public subnets.

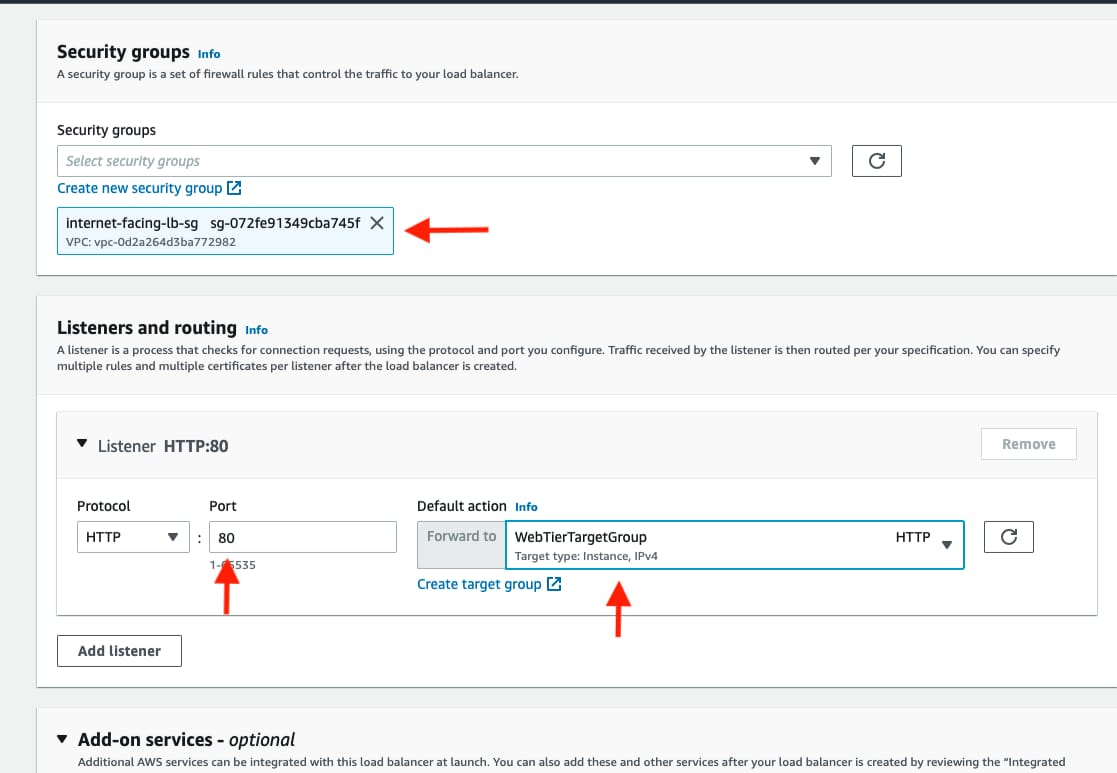
Select the security group we created for this internal ALB. Now, this ALB will be listening for HTTP traffic on port 80. It will be forwarding the traffic to our target group that we just created, so select it from the dropdown, and create the load balancer.
//
Launch Template
Before we configure Auto Scaling, we need to create a Launch template with the AMI we created earlier. On the left side of the EC2 dashboard navigate to Launch Template under Instances and click Create Launch Template.

Name the Launch Template, and then under Application and OS Images include the app tier AMI you created.

Under Instance Type select t2.micro. For Key pair and Network Settings don't include it in the template. We don't need a key pair to access our instances and we'll be setting the network information in the autoscaling group.

Set the correct security group for our web tier, and then under Advanced details use the same IAM instance profile we have been using for our EC2 instances.


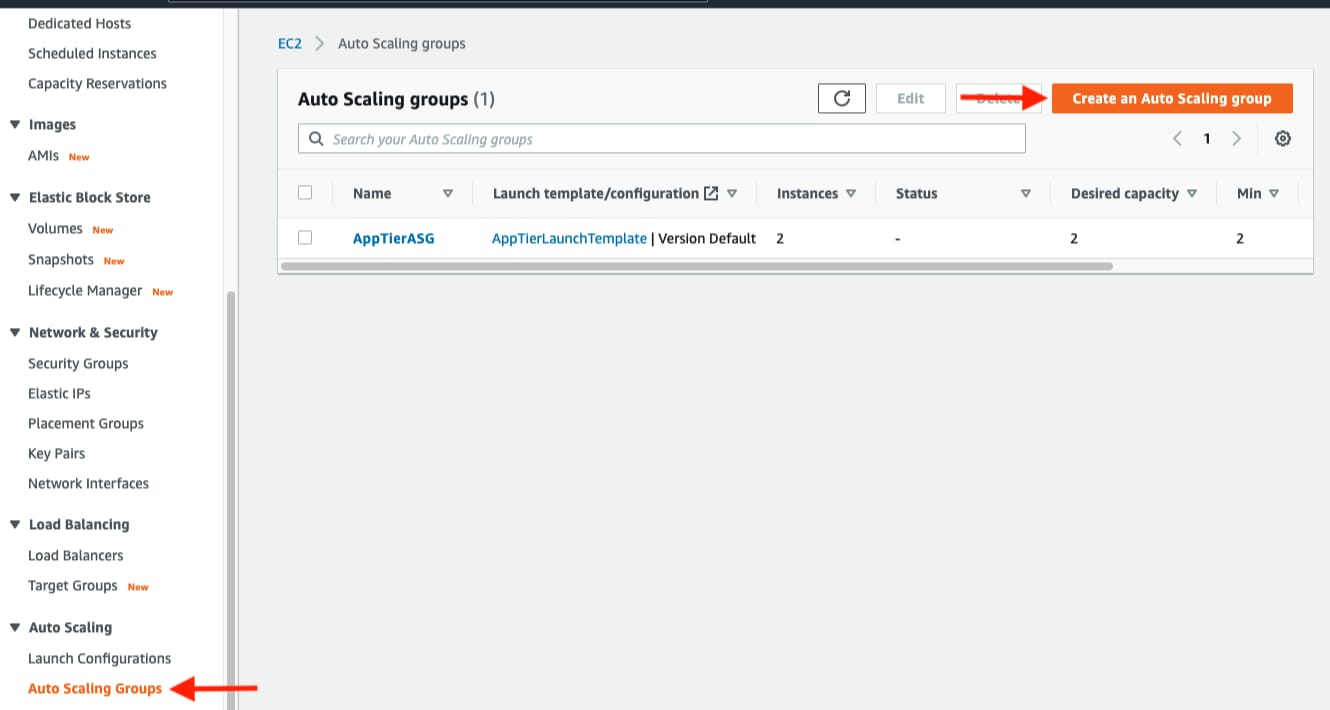
Auto Scaling
We will now create the Auto Scaling Group for our web instances. On the left side of the EC2 dashboard navigate to Auto Scaling Groups under Auto Scaling and click Create Auto Scaling group.
Give your Auto Scaling group a name, and then select the Launch Template we just created and click next.

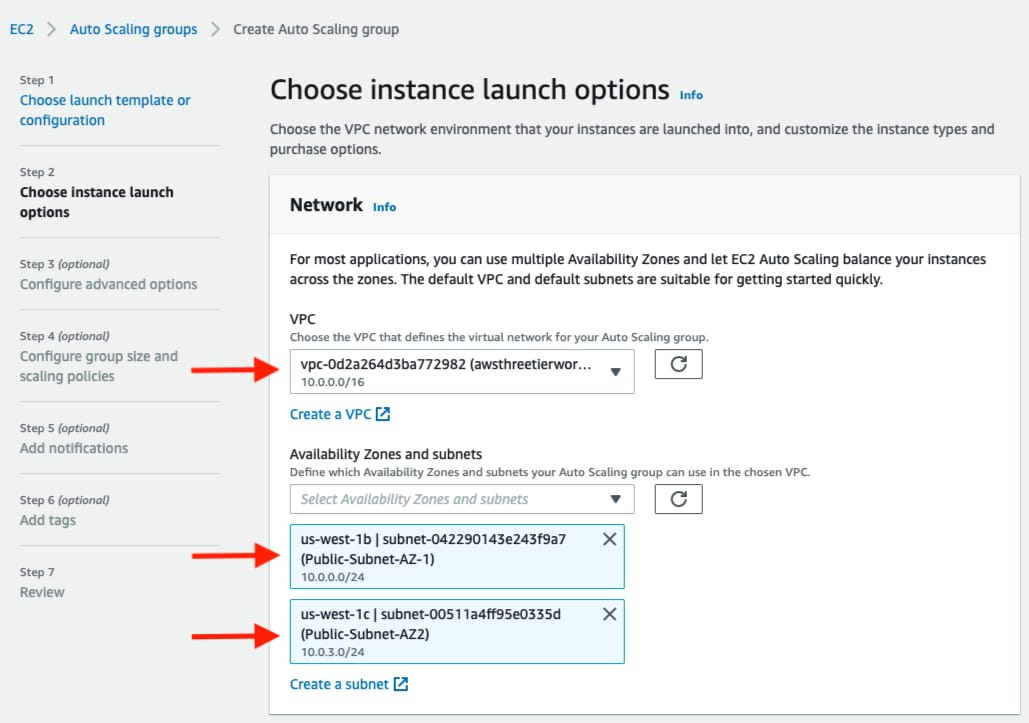
On the Choose instance launch options page set your VPC, and the public subnets for the web tier.
For this next step, attach this Auto Scaling Group to the Load Balancer we just created by selecting the existing web tier load balancer's target group from the dropdown. Then, click next.

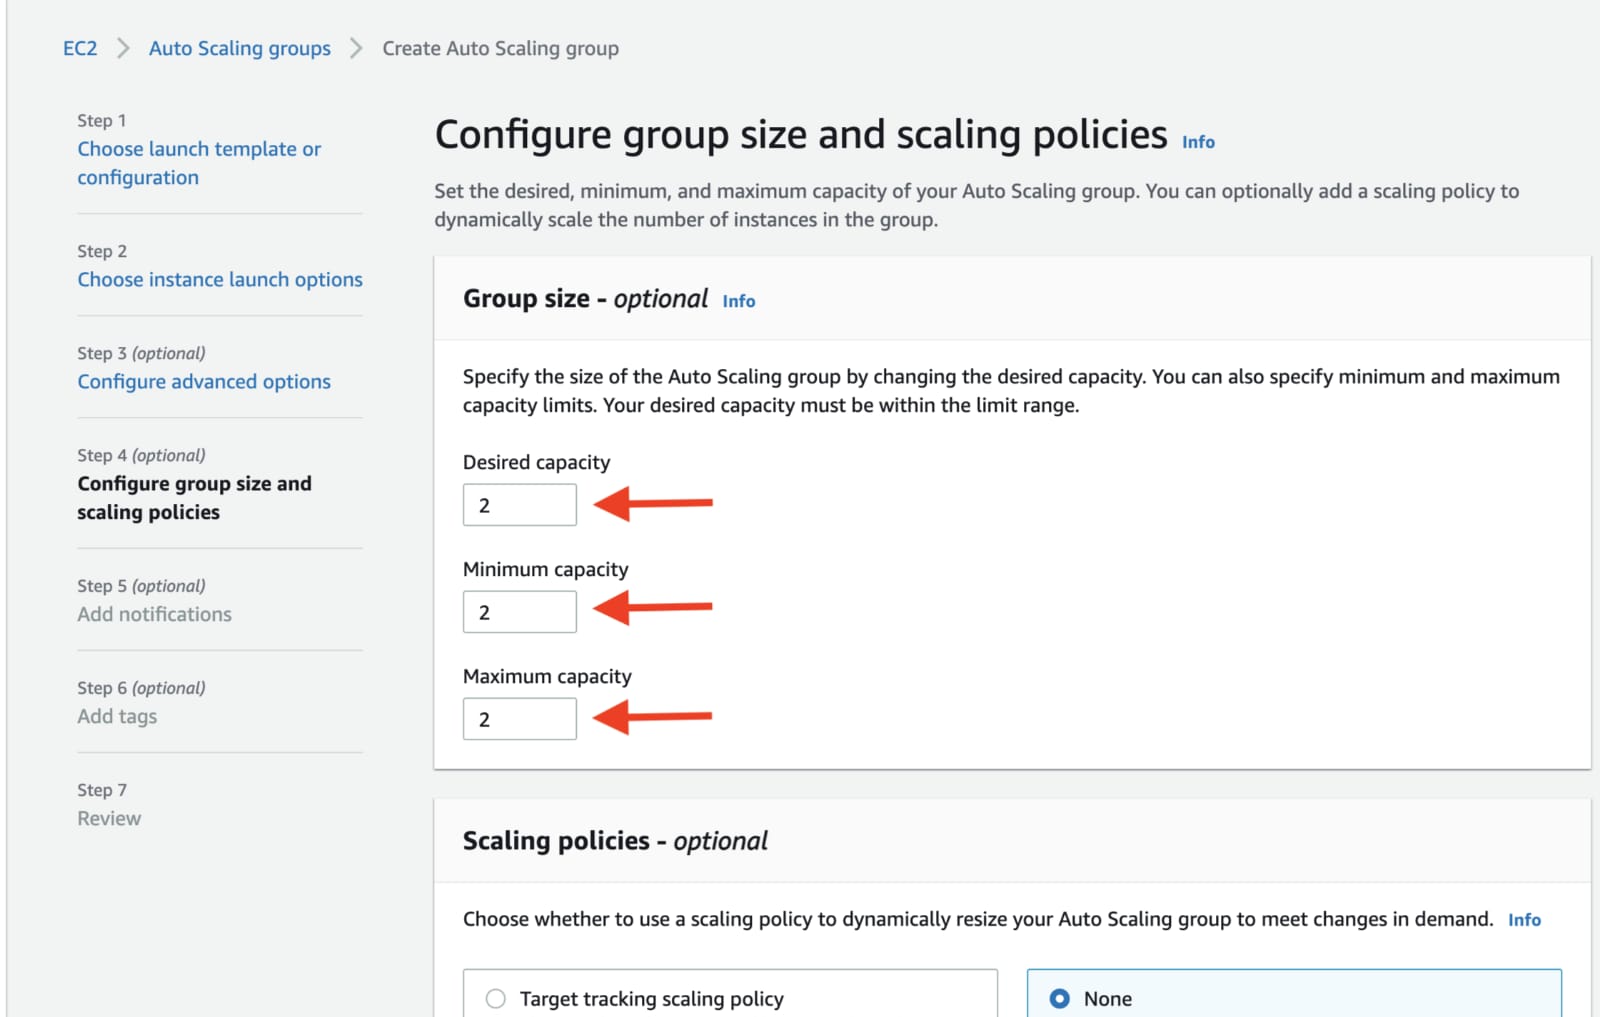
For Configure group size and scaling policies, set desired, minimum and maximum capacity to 2. Click skip to review and then Create Auto Scaling Group.
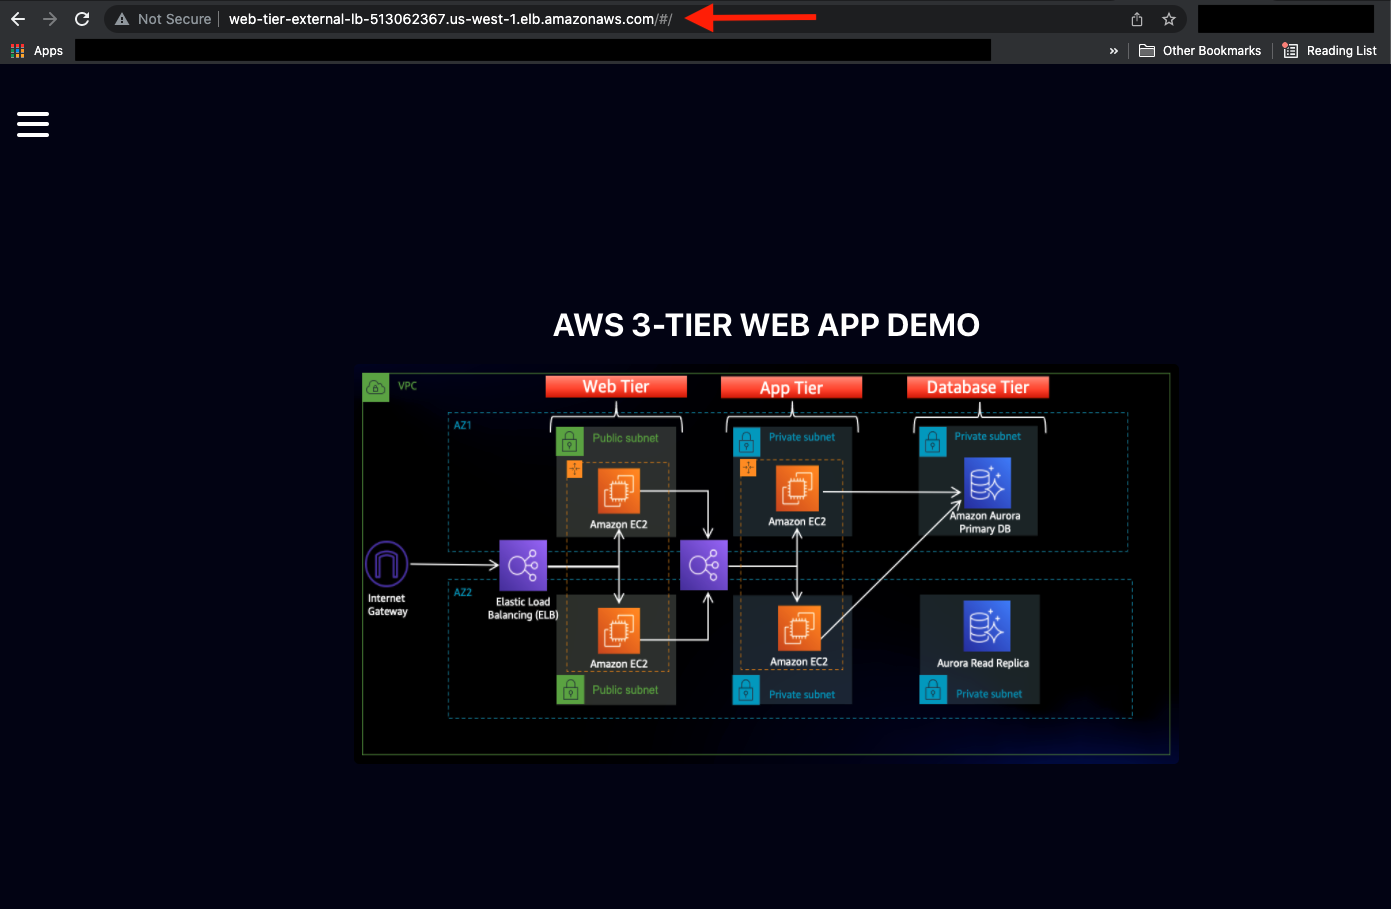
Finally we get our "WebApp"
Conclusion
Well done on successfully completing your three-tier architecture project on AWS! It's a significant accomplishment to have followed through from Part 1 to Part 7 of the blog series. Before wrapping up, it's essential to ensure that all the services you created for learning purposes are properly cleaned up to avoid any unnecessary costs or lingering resources.
Thankyou !!!
Hope You have Learned !!!