AWS Three-Tier Architecture: Part-6
Update Config File
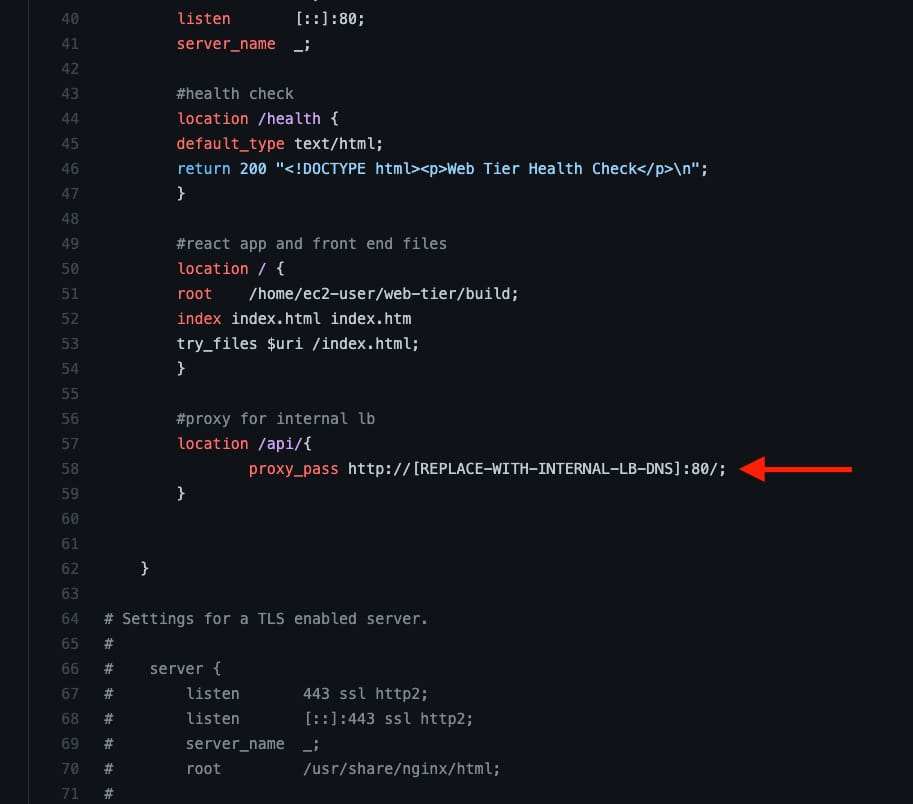
Before we create and configure the web instances, open up the application-code/nginx.conf file from the repo we downloaded. Scroll down to line 58 and replace [INTERNAL-LOADBALANCER-DNS] with your internal load balancer’s DNS entry. You can find this by navigating to your internal load balancer's details page.
DNS Name is,
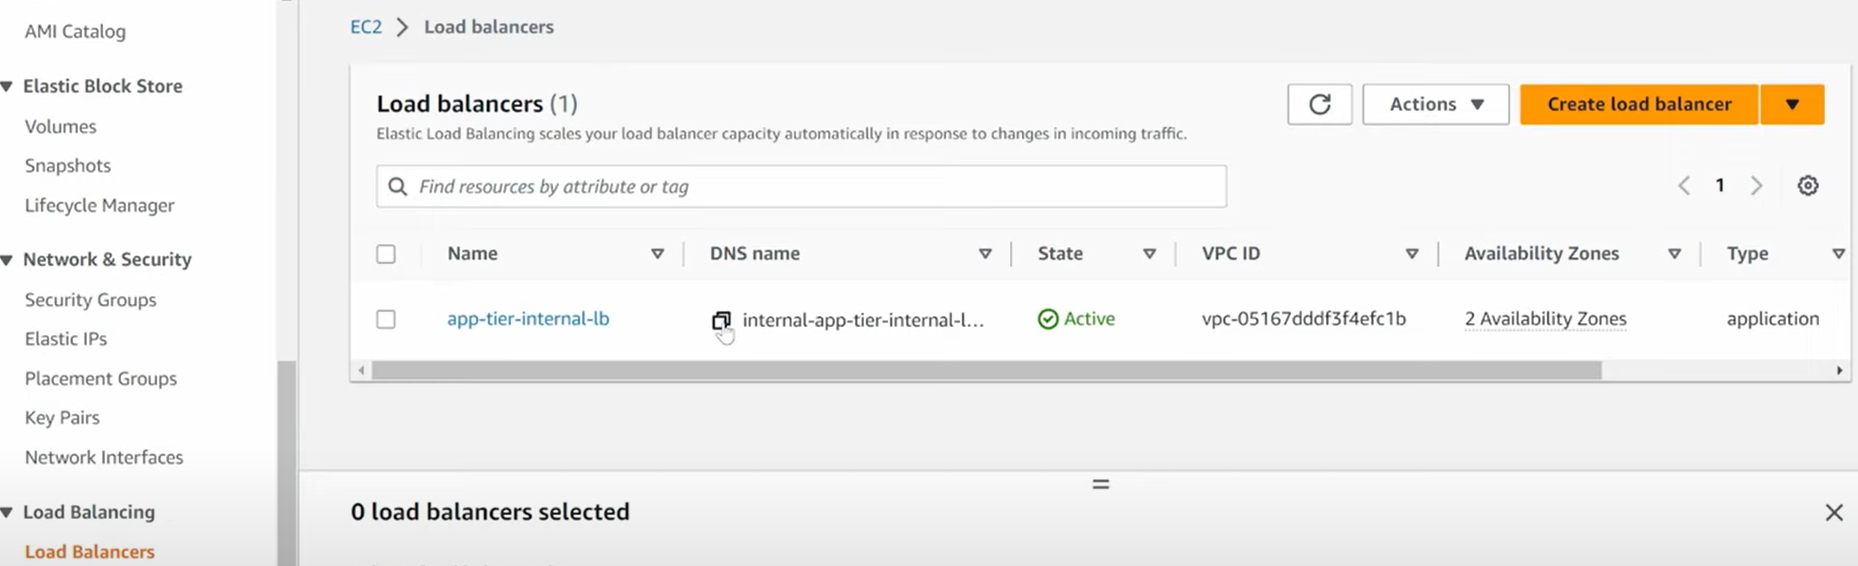
Copy the above DNS name and replace in your nginx.conf file
Then, upload this file and the application-code/web-tier folder to the s3 bucket you created for this lab.
Web Instance Deployment
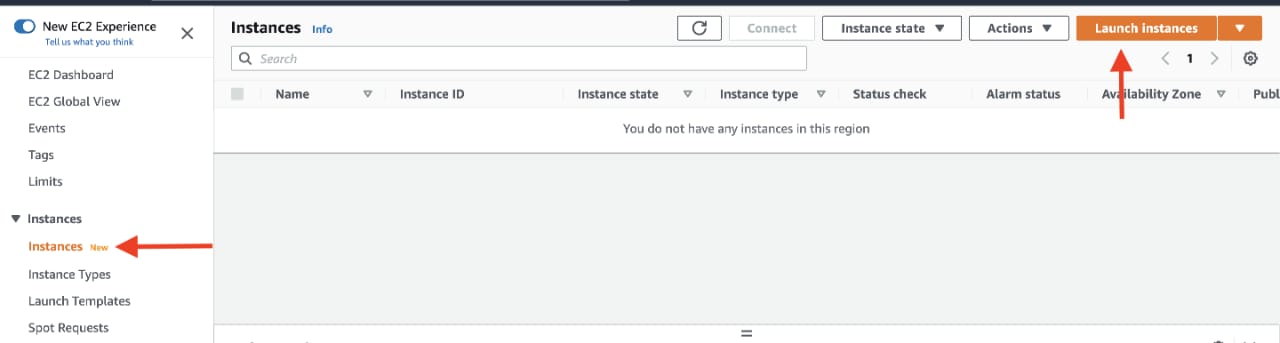
Navigate to the EC2 service dashboard and click on Instances on the left hand side. Then, click Launch Instances.
Select the first Amazon Linux 2 AMI.

We'll be using the free tier eligible T.2 micro instance type. Select that and click Next: Configure Instance Details.
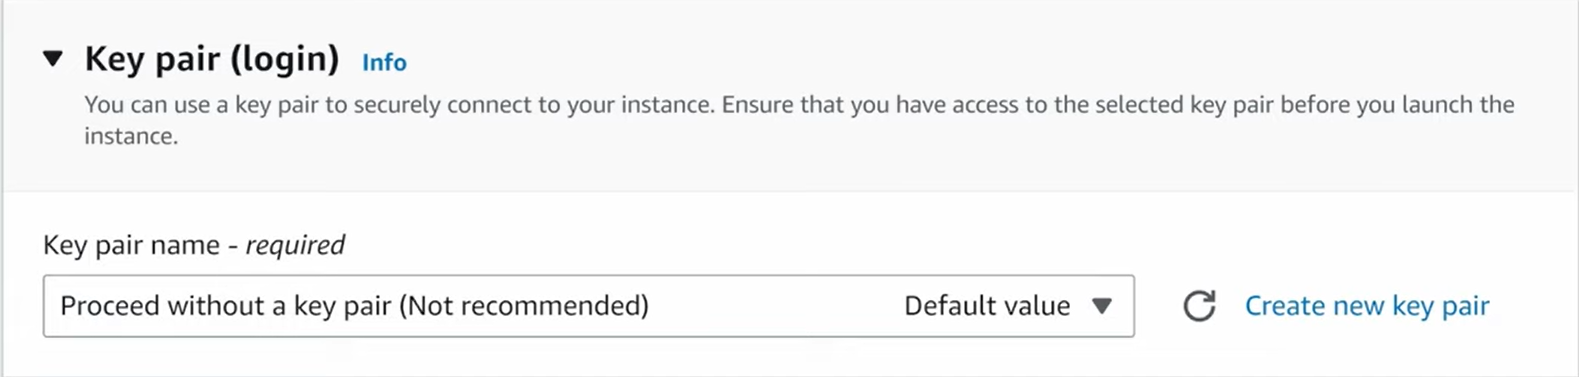
Proceed without key-pair because we going to use ec2-instance login.
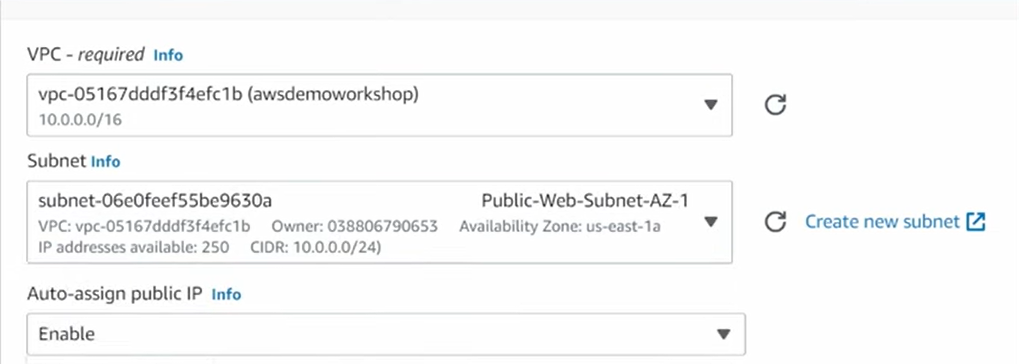
When configuring the instance details, make sure to select to correct Network, subnet, and IAM role we created. Note that this is the app layer, so use one of the private subnets we created for this layer.
Below we using already created VPC and Public Subnet AZ-1 and Enable auto assign Public IP
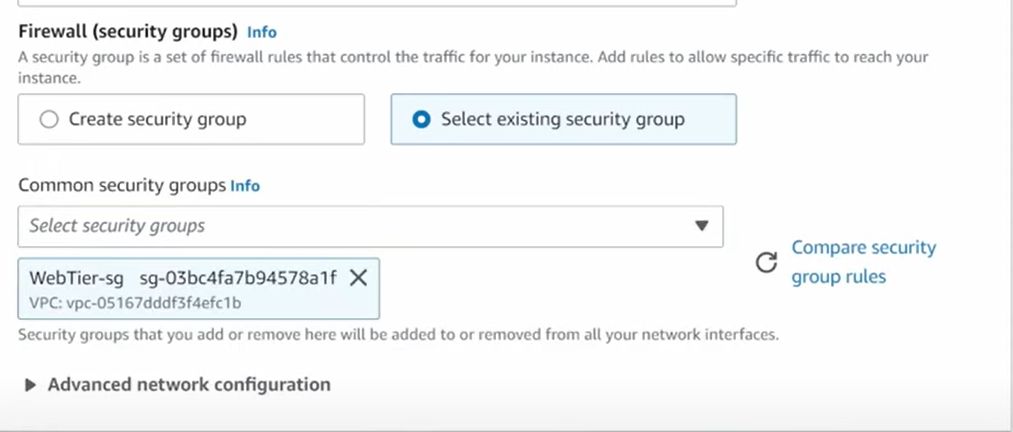
Below we using already created web tier security group
Below we using already created IAM role

Finally click "Launch Instance"
Connect to Instance
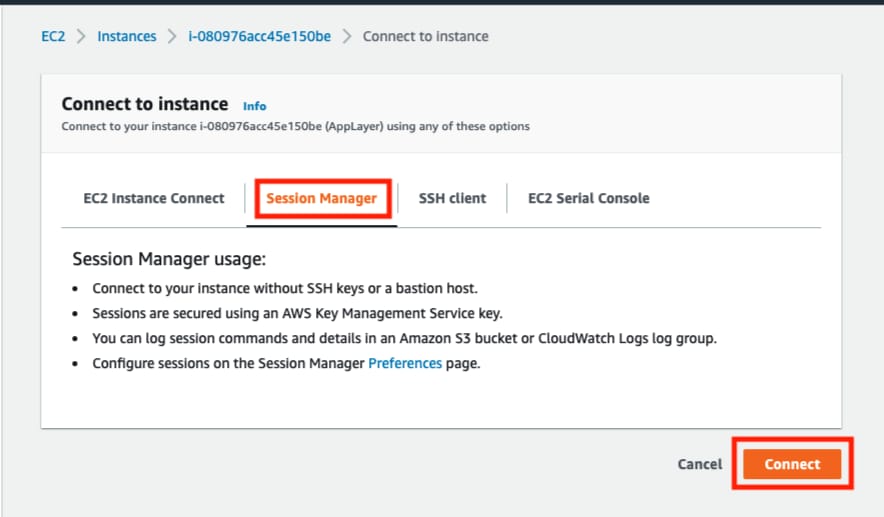
Navigate to your list of running EC2 Instances by clicking on Instances on the left hand side of the EC2 dashboard. When the instance state is running, connect to your instance by clicking the checkmark box to the left of the instance, and click the connect button on the top right corner of the dashboard. Select the Session Manager tab, and click connect. This will open a new browser tab for you.
Test connectivity here via ping as well since this instance should have internet connectivity:
 sudo -su ec2-user
 ping 8.8.8.8
//
Configure Web Instance
We now need to install all of the necessary components needed to run our front-end application. Again, start by installing NVM and node :
 curl -o- https://raw.githubusercontent.com/nvm-sh/nvm/v0.38.0/install.sh | bash
 source ~/.bashrc
 nvm install 16
 nvm use 16
Now we need to download our web tier code from our s3 bucket:
 cd ~/
 aws s3 cp s3://BUCKET_NAME/web-tier/ web-tier --recursive
Navigate to the web-layer folder and create the build folder for the react app so we can serve our code:
 cd ~/web-tier
 npm install
 npm run build
NGINX can be used for different use cases like load balancing, content caching etc, but we will be using it as a web server that we will configure to serve our application on port 80, as well as help direct our API calls to the internal load balancer.
sudo amazon-linux-extras install nginx1 -yWe will now have to configure NGINX. Navigate to the Nginx configuration file with the following commands and list the files in the directory:
 cd /etc/nginx
 ls
You should see an nginx.conf file. We’re going to delete this file and use the one we uploaded to s3. Replace the bucket name in the command below with the one you created for this workshop:
 sudo rm nginx.conf
 sudo aws s3 cp s3://BUCKET_NAME/nginx.conf .
Then, restart Nginx with the following command:
sudo service nginx restartTo make sure Nginx has permission to access our files execute this command:
chmod -R 755 /home/ec2-userAnd then to make sure the service starts on boot, run this command:
sudo chkconfig nginx on
Conclusion
I hope you found this journey through AWS three-tier architecture implementation insightful and enjoyable.
Please continue to Part 7 to learn more about the final steps in our implementation process.
You can access Part 7 via the following link below:
AWS Three Tier Architecture(Part-7)
Thankyou !!!
Hope You have Learned !!!